I love this time of year when my perennials are all in bloom! Here are a few shots from my garden… no filters, just iPhone photos. 💕


I love this time of year when my perennials are all in bloom! Here are a few shots from my garden… no filters, just iPhone photos. 💕
The patio is ready for summer and so am I! We have one week of school left to go and then the glorious, lazy days of summer will be upon us.
Lucky for me, Mother Nature did most of the work this year. My flowers are perennials so they magically appear in the spring. I pressure washed the patio, added new green chair cushions, and hired our lawn service to mulch the beds. That’s it! Take a peek…


I’m looking forward to summer days at the pool with friends – and summer nights on the patio. How about you? What’s your favorite part of summer?
Sources: most of this is several years old but the green chair cushions, little green flowerpots, and side tables were bought at Target; owl lantern and fire pit both came from Walmart; patio set is a vintage hand-me-down from my parents.
Spring was a little late to arrive this year which is making the warm, sunny days and green-green-green all the better! I finally had a free day to work on the patio today. What a glorious day! The weather has been amazing — best time of year to enjoy the patio! This afternoon, I pressure washed the concrete and put out new green seat pads for the chairs. All my flowers are coming in and the apple trees and blueberry bushes are beginning to show signs of a tasty summer…


Hydrangea, Salvia and Coneflowers fill the space between Bryan’s blueberry bushes and the Crepe Myrtle.


Can’t wait to enjoy some warm evenings around the fire pit.
So, what are you doing to get ready for Summer? I’d love to hear!
As a follow-up to my last post about ever-evolving trends, I wanted to share two kitchen renovations I love. Both of these kitchens were completely overhauled on a budget. I’m not particularly impressed by a beautifully renovated kitchen when the homeowner has tens of thousands to spend. I would hope you could have a beautiful kitchen if you spend tens of thousands of dollars on a renovation. A tight budget requires ingenuity! And that’s when things get interesting…
The two kitchens I want you to see both have black and white painted cabinets and brass hardware – but one is modern and the other is traditional.
Ashley from Bigger Than The Three of Us is slowly renovating a 60’s split level – which means pulling down a lot of wallpaper and ripping out carpet in the bathrooms. She created a modern, minimalist kitchen herself working with the existing layout, cabinets and countertops. The “before” pictures are scary.
Jennifer from Dimples and Tangles lives in a traditional brick rancher with an open floorplan. Her style is traditional which you’ll see in her selection of light fixtures, accessories, and fabrics in the adjacent breakfast nook. The original kitchen was lifeless – stained cabinets, wallpaper, etc. What’s funny if you read through her 2012 renovation is that she painted the brass hardware to look like antique bronze, because that was a trendy finish. Now that brass has surged in popularity, she’s added brass finishes.
Hopefully these makeovers will inspire you as you consider making updates in your home. If you’re curious, here’s what I dream about doing to my kitchen: creamy painted cabinets like this or this – with a creamy arabesque tile backsplash like this.
You may know that I follow a lot of interior designers on social media. Whenever somebody recommends a new designer to me, I’ll quickly scan their posts to get a feel for their style. Most popular designers have gravitated to “California Casual”. Scan through the following images and you’ll see what I mean.


Ten years from now, white on white on white with light wood will look dated because it so characterizes the current style. And as Chip and Joanna Gaines wrap their final season on HGTV, it’s safe to say their Magnolia “modern farmhouse” look will forever be associated with them and that show. Someone will fill the void and become the new “it” designer to the masses – and who knows how they will influence our style.
Take a look at these trends that were everywhere 5-10 years ago: java stained cabinets, chevron patterns, vinyl wall words, hand scraped hardwood floors… They all look so dated now.


I think we can all agree sliding barn doors are not a lasting trend, even though they’re cool. If you like them, install one. Replacing it will be a relatively inexpensive fix in 5-10 years. Paint is easy to change, too, so you should always pick colors you love without worrying about trends. Even light fixtures can be reasonably affordable to update. Other changes can be incredibly costly, so it’s best to avoid trends when selecting flooring, appliances, and countertops – just stick with classics.

Before we go any further, I should clarify that my house is an extravaganza of the Tuscan brown trend of the 2000s which was characterized by bold granites, warm earth-tones, tumbled stone, antique bronze hardware and ornate light fixtures. See also: medium toned hardwood floors and stained cabinets, plush carpet, ornate mantels, etc. I could go on, or you could visit my house, but I think you know the look.
The trick, my friends, is to either win the lottery and constantly renovate to stay current – or – make classic updates that have staying power. (Or really, you could just live in a time capsule, which is an admirable option for those of you who live lightly in your homes and don’t really “need” updates!)
Determining what will truly have staying power can be challenging. One trick is to try picturing the items you’re considering in a home in the 1990s – or 1960s. Would it look modern and out of place? Or would it have fit in? Or think back to homes you were familiar with 20-30 years ago and ask yourself if the finishes would look as good today. A friend’s parents lived in a 1930s Tudor with a white kitchen whose 1990s remodel would look just as amazing today – because the finishes they chose were timeless.
White kitchens are VERY IN right now. But when has a white kitchen not been? White (and soft neutral) cabinets are more timeless than trendy – and thus a safe bet as you make updates. Marble countertops have always been in style. Butcherblock has an ebb and flow of popularity but always looks good in the right context. Plumbing fixtures in chrome and nickel are never out of style. All of these are safe bets as you update.
Subway tile is a tough call, along with open shelving in the kitchen. They have both been timeless classics – but that was before they became ubiquitous! (We can blame Chip and Joanna! Ha!) I really like both, so I’m hoping they remain classics.


A local builder told me he had never been asked to install shiplap until just a few years ago, and now virtually every home he builds includes shiplap at the buyers’ request. Go figure – Joanna Gaines loves some shiplap! So it’s probably going to look “so 2010s” a decade from now. But if you like it, go for it! Someday, if you decide you are tired of it, you can pull it down and patch the drywall behind it at minimal expense. You can’t lose.


What’s hot for 2018 and the next few years to come? Trends always take a while to work their way to suburban America, but once they do, they stick around longer, so count on hardware and lighting in matte brass finishes looking good for another decade. Ditto for black finishes. Warm colors are coming back to our walls and fabrics. Not-so-boring shades of beige are re-emerging to replace bright whites – and beige is bringing with it a palate of warmer, richer colors. Gray is pretty classic but the cooler grays of recent years are being replaced by warm grays.
The pendulum swings wide, so count on the minimalist style of California Casual and the rustic nature of Modern Farmhouse being eclipsed by a more luxurious feel in fabrics and finishes. We are already seeing these changes in the rising popularity of velvet sofas and curtains in rich jewel tones. Just know it may be 5+ years before these trends are entrenched out here in the suburbs!
If you’re interested, google some of the designers I follow:
I’m overdue to share my best DIY tip and it weighs heavily on me imaging how many people replaced a chipped cooktop thinking it could not be repaired.
I absolutely love having a modern, electric, smooth cooktop. You can keep your gas, thank you very much. I’ve used both gas and electric stoves and the smooth cooktop wins hands down for ease of use, cleanliness and safety. (When I lived in London, my gas stove leaked and the experience scared me to death.)
A couple years ago, our old cooktop shorted out and we replaced it with another Kitchen Aid. Within days, someone dropped a heavy pot and chipped the edge of the cooktop! The chip left a jagged edge that was really dangerously sharp. How did the original one last 10 years and this one didn’t survive 10 days?!? The original had a metal trim piece surrounding the edges, while the new one was frameless. That could have been a factor. Also, we are clumsy.
And then… it happened again. This time, we smashed off a corner and the raw edge could honestly slice off a finger. The cooktop wasn’t safe to use and I thought we would have to buy another on the heels of an already large expense. But an idea struck me: I had recently discovered a product called Sugru.

By the way, this not a sponsored post. Companies don’t pay you to blog about their products when your blog has as few readers as mine. Haha! I’m really just very enthusiastic about Sugru!
Sugru is a “moldable glue”. It comes in little ketchup-sized packs and feels like Silly Putty when you open it. Once exposed to air, it will harden into a tough plastic within 24 hours. I had used it to secure wobbly posts in our “wrought iron” (read: black aluminum) gate and fence and it worked like a charm. It was certainly worth a try as a fix for our broken cooktop.

It’s been more than two years since I patched over the jagged edges and I am happy to say the Sugru fix has worked perfectly. (That little hairline fracture you see isn’t sharp.) The cooktop functions as it should and nobody has sliced off a finger. It’s a win win. Ha!

Sugru comes in several colors. I obviously used black and while you can still see it, it’s not super obvious. The patch on the front right is the big one. The smaller one is top left and it’s inconspicuous.
And again, nobody got stitches – and – I saved about $1500, so I am super happy with the results! I hope this tip saves someone else a lot of money.
We inadvertently tackled a mini-makeover of half the house over the Christmas break! It began with the need to purchase a hospital bed for Bryan. Suddenly we were painting walls and hanging curtains and moving furniture among 4 rooms! And while the timing was absurd with all the Christmas hubbub — with no one to blame but myself for the logistics and complexity — I’m happy to report everything was in place by Christmas eve. The house looks great and was/is as clean and organized as it has been in many months! I’ll be sharing photos of the changes in the coming weeks, but first, here is my office.

The changes in here were minimal: I just swapped out the side table, a rug and some decor — and deep cleaned the mini-sofa bed before putting a new slipcover on it. Sometime in the next year or two or three, I am going to paint the walls, fill the nail holes, and shuffle all the artwork. Until then…


This rug has been in the living room, den, master bedroom and now the office.

My desk is always a mess. Ignore that!
I hope you enjoyed the tour!
Every summer, I plant a variety of Coleus or sometimes Hosta Lillies in the pots on the front porch. The trick is to find plants that grow quickly in the shade. It helps if they are fairly hardy because I occasionally forget to water them for a couple weeks. Ha! You know, people first, then the pets, and then the plants. So far so good!
So here is a series of photos of my front porch from a couple weeks ago going back in time to early March when I first started. I get such a kick out of these pots every year – it’s so magical seeing it all grow! (Or maybe I am easily entertained!) I should point out that the sweet potato vine grew so quickly and was so big and healthy, then it just up-and-died in a 2-3 day stretch for no known reason.
OK, with that, enjoy the photos!


I give up. I accept that I’ll likely never know why WordPress ate the photos in so many of my 2015 blog posts – but, pressing onward bravely, I’m going to share a house update!
Brown is my favorite color – really everything neutral and earthy is calming to me. Blue was my favorite in the 80s and and I must have overloaded, because my home and my wardrobe went earthy neutrals in the mid/late 90s and I’ve never looked back.
Brown has been the dominant color in our house:


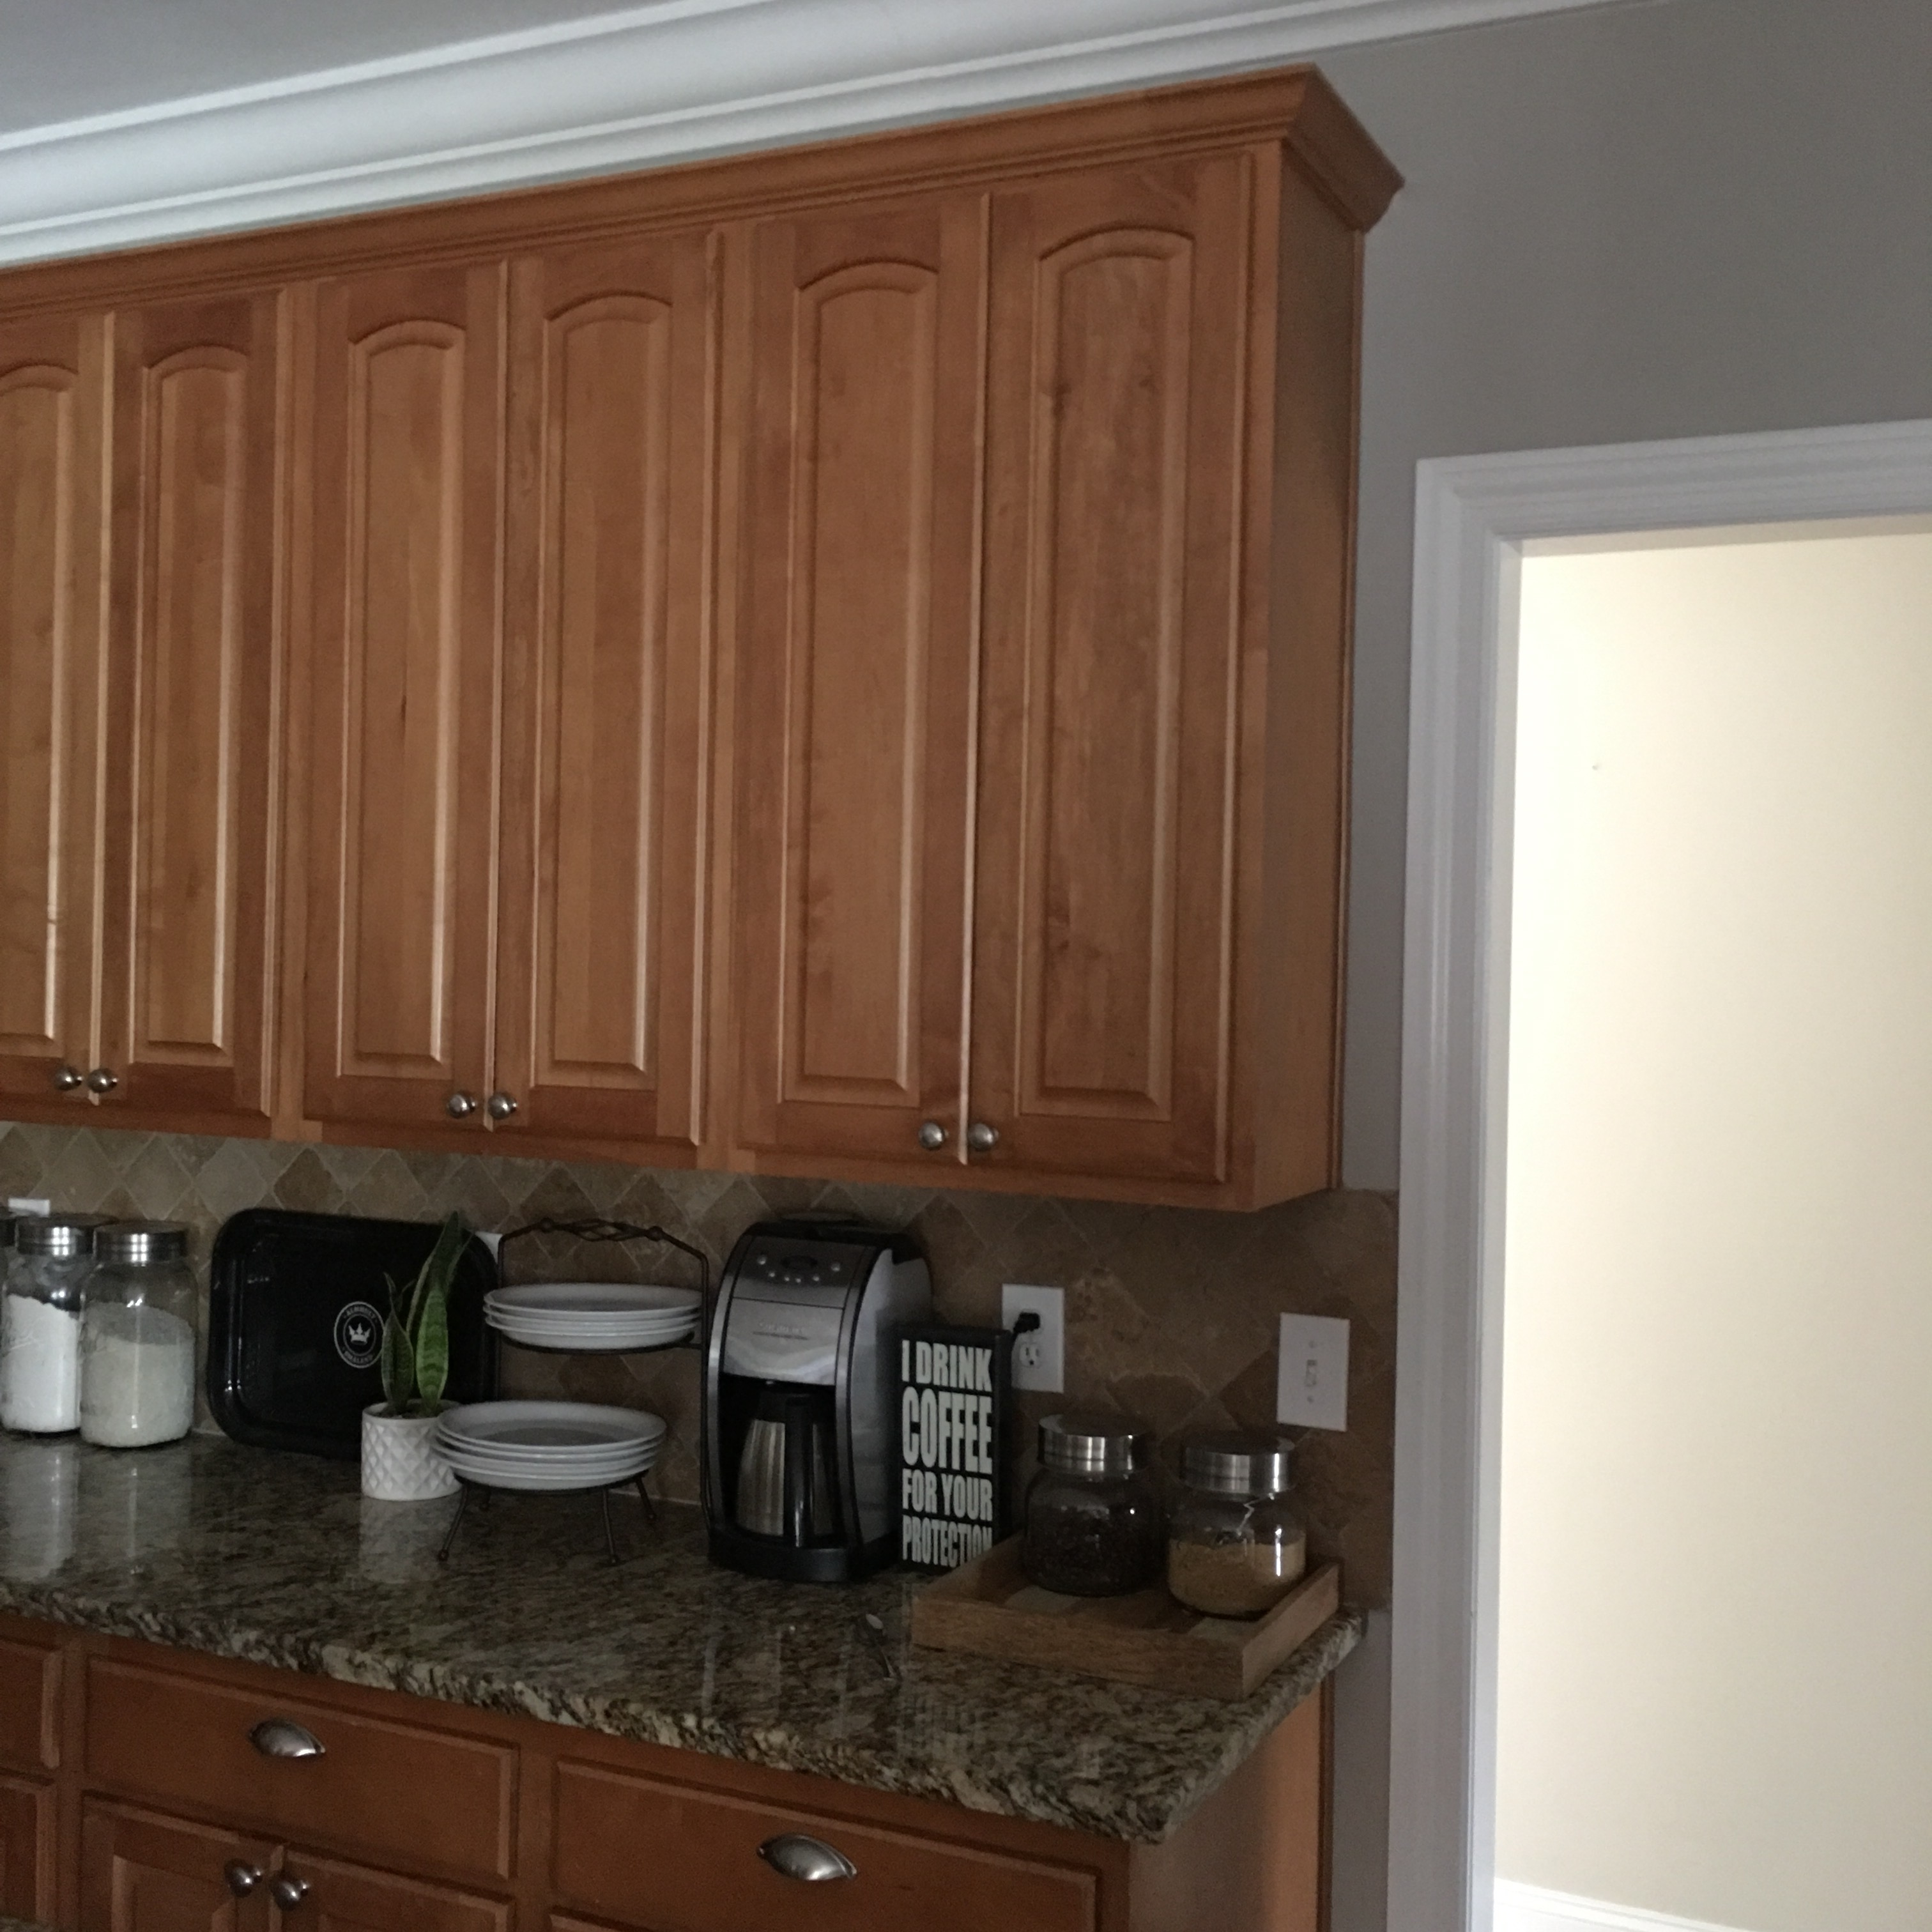
That said, I was super tired of e-v-e-r-y room in our house being brown. And bugged that in certain light, the brown looked green. (See photo above.) Every room’s color was on the same Sherwin Williams paint swatch – Kilim Beige, Hopsack, Steady Brown… This time, I wanted something a little more “fresh” that would tone down the orange of our maple cabinets in the kitchen, so no green.

Oh, you thought I was going to turn the world on it’s end? No, sweet friends. That would be cuckoo. <wink> I just wanted to throw in some greige. This “inspiration” color combo above is awesome, but my research (and testing) confirmed a hint of green in the Revere Pewter, so I went with it’s kissing cousin of colors – Sherwin Williams Colonnade Gray. You couldn’t tell them apart unless you are someone who is ridiculous enough to watch YouTube reviews from decorators discussing paint undertones. (And that would be me.)

Colonnade Gray is actually gray and it’s a pretty saturated color – not really “greige” or “light” like say Benjamin Moore Edgecombe Gray. (My friend Dawn just painted her whole interior Edgecombe Gray and it is stunning!) Anyway, Colonnade Gray is definitely a warm gray as you see in the kitchen photos below – but sometimes it skews tan depending on the lighting in the room and time of day – as you can see in our entry, above.
We touched up the trim with Sherwin Williams Extra White and I’m super happy with that contrast!


I’ve got some black here and there in furniture, a little decor, frames, stair railings, etc. and I am liking how it all comes together so differently with the relatively simple change of our wall color.
Up next, I’ll share some of my recent gardening exploits.
I decided to capture my “lessons learned” from this summer so I can keep track of what is and isn’t working. Some things have been so easy to grow and others have been disasters!
LESSONS LEARNED
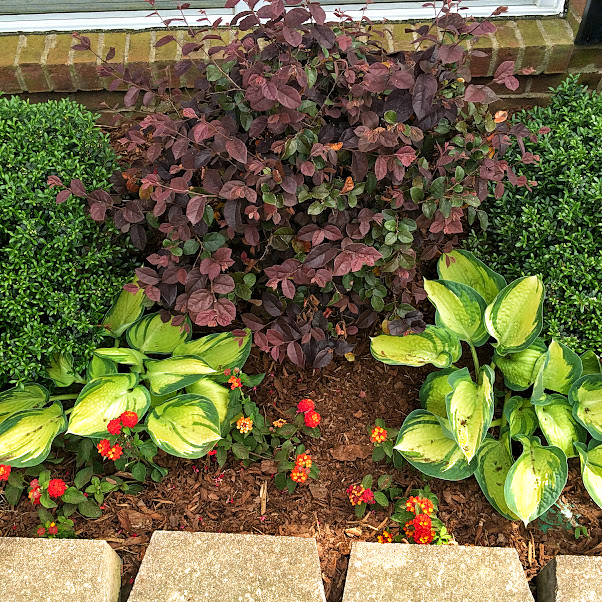
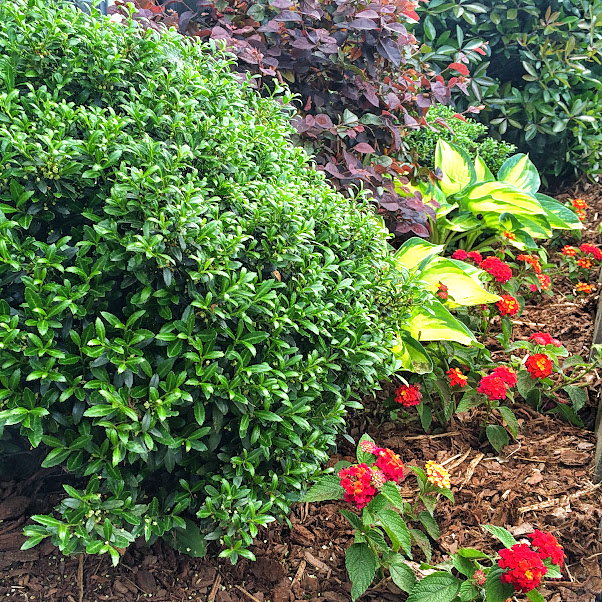
Here’s what I now know: Lantana is really easy to grow but it needs sunshine, rain and a lot of space to spread out. In the picture below, you’ll see the Lantana that I planted last Spring… So cute. So little. So unassuming.
May
May
In July, it was still a great little pop of color, but it kept on growing like Jack’s beanstalk!
Yikes.
Some of the Lantana branches grew from 2 inches long to 4 feet long! By August, it had completely covered the Hostas. Next Spring, I will plant Lantana in a sunny spot with plenty of room to grow!
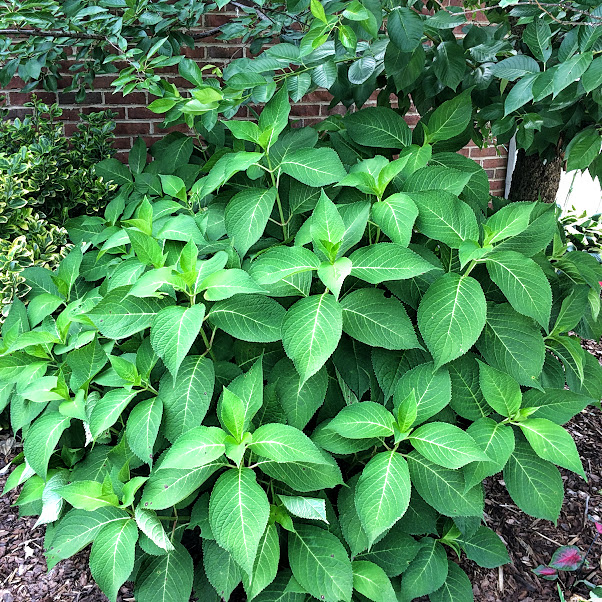
Next up, I deduced that Hydrangeas need a lot of water. I’ve had three Hydrangeas under a Flowering Cherry tree for many years, but the tree is bigger and fuller now which blocks access to sun and rain.
They start out looking great in the Spring, but by mid-summer, they droop and need me to supplement with the hose.
Womp womp.
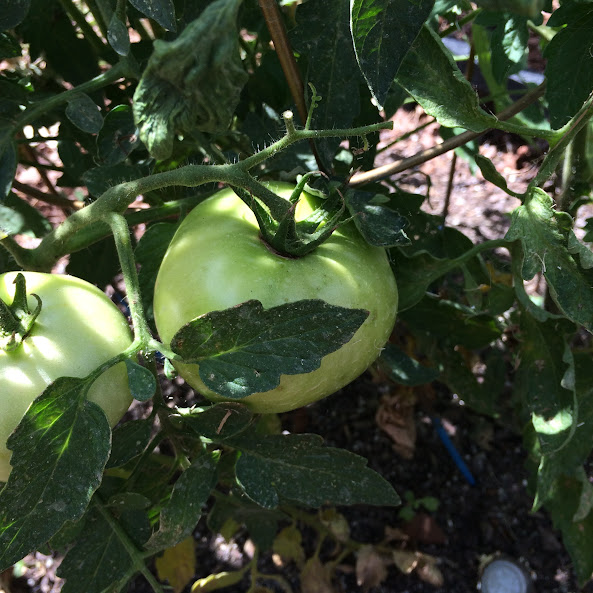
My failed attempt at a vegetable garden devolved into a real life Attack of the Killer Tomatoes! In the picture below, you’ll see our teeny tiny plants next to a big tomato cage…

By mid-summer, each plant was 5 feet tall and 2-3 feet wide. They grew together into this woven mess where tomatoes couldn’t get any sunlight and wouldn’t ripen. They all strangled each other in a dramatic, prolonged death scene and I finally had to haul the whole nest to the curb. I couldn’t even pull the cage loose from the vines!
Next year: one tomato cage per plant – and – in a new location with afternoon sun.

Here’s what has been easy…
Sunflowers grow very fast and very tall.

They need a sunny spot and you cannot crowd them or they’ll create shade and kill themselves off. I had waaaaaaay too many crammed into this little spot.
Caladiums are happy in any shady spot. These were grown from bulbs I planted under a tree. I’ve always had success growing them in pots, too, as long as they’re shaded by a porch.
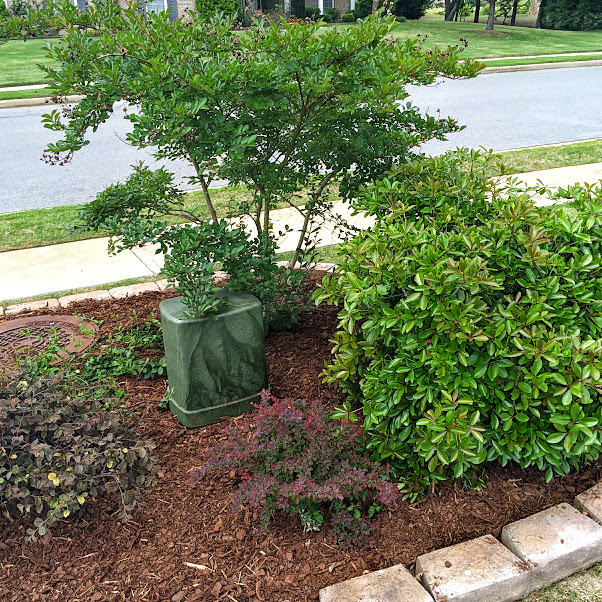
Everything in this picture above is easy – just plant it and walk away. I have never killed a Crepe Myrtle tree! And that is saying something, friends! Ditto for Red Bud trees. They are so resilient! All these shrubs are unkillable, too: the green one is called Cleyera and the purple ones are both varieties of Loropetalum. Down low is a ground cover called Purple Winter Creeper.
Monkey grass is [sadly] unkillable so I contend with it. #notphotoworthy
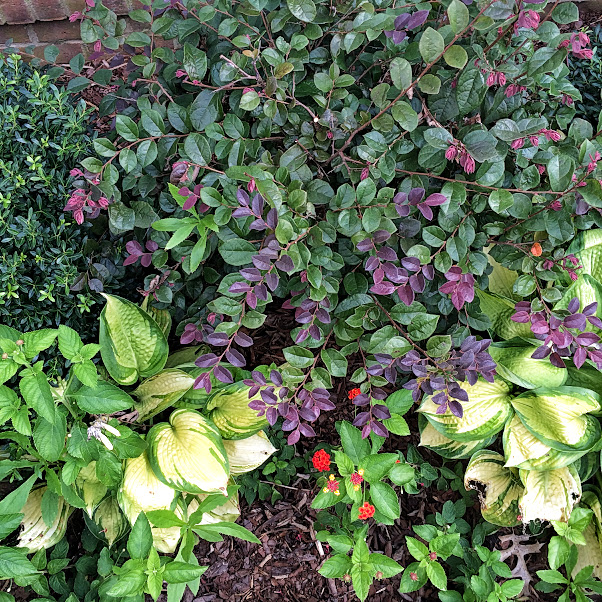
Here’s a close-up of another Loropetalum. I have several varieties and they all add such nice color!
Likewise, Nandina will grow everywhere I stick it in the yard and adds such nice color – evolving from green to orange or red. Some varieties are lime.
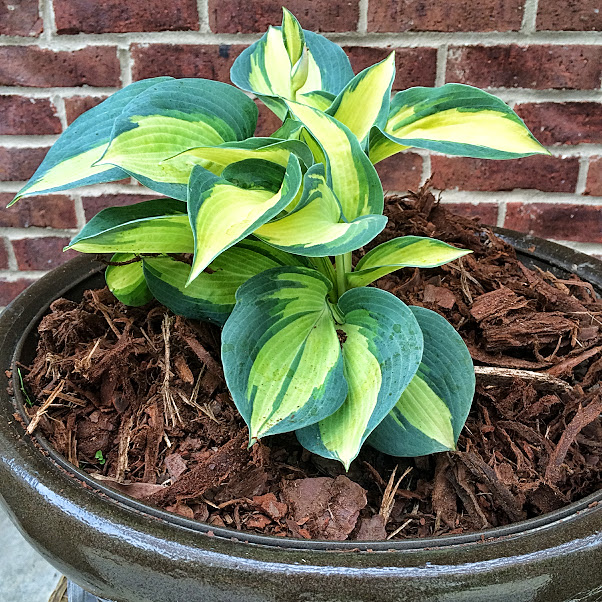
Hosta Lillies come back year after year whether in a pot or in the ground. They just want a shady spot. So easy and so pretty!

These are my favorites: Purple Coneflowers a.k.a. Echinacea. This variety is Kim’s Knee High (gotta love the name). They come back every year bigger and better than the year before! I may put a little cage around them next year for support and/or to keep kids and pets from tromping through them.

Gosh, I am in love with these flowers.
I have two spots in the yard that kill everything I plant there. Ever the optimist, I am going to try again next Spring and see what happens!
NEXT STEPS
My plans for the Spring = dig it all up and move it all around and hope that makes all the difference: